


Introduction
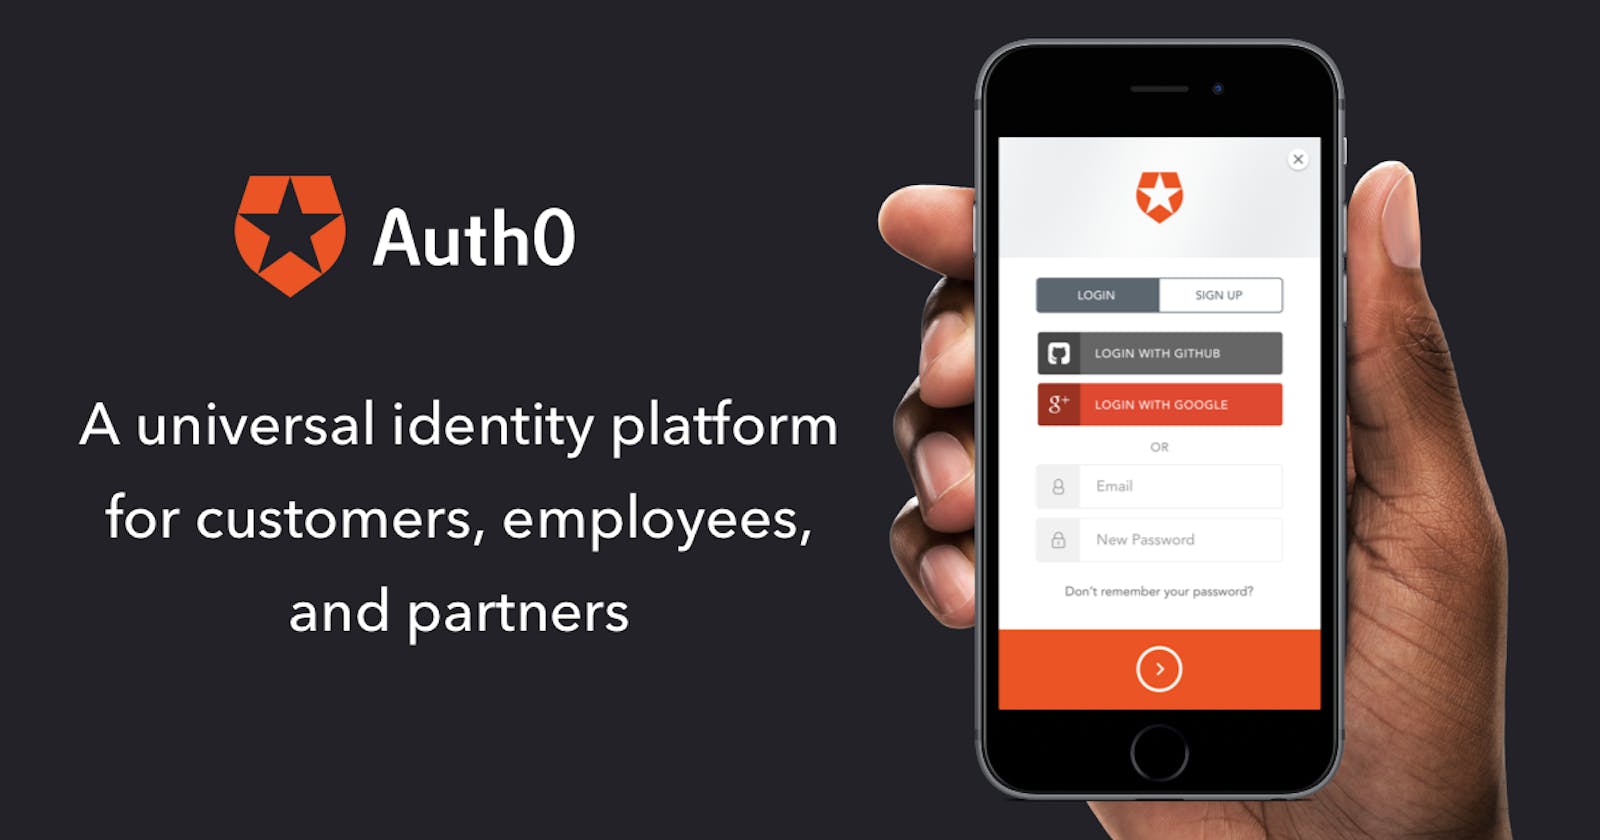
Ever wondered what it will be like to be working on a particular project, and you have to build your own authentication service from scratch? Crazy right? Auth0 and other great platforms like Firebase, have relieved you of the stress of building your application without worrying about authentication or authorization. You can connect any application written in any language or stack with Auth0. What you need, is to choose the right technology relating to your app, call the API, and hook it up to your app.
Prerequisites
In this article, we would be discussing how to integrate Auth0 in your application using React. It is expected you know the following before continuing with this article:
- An understanding of how React works.
- A React development environment set up with Create React App
- You will also need an intermediate knowledge of JavaScript, HTML, and CSS
- A knowledge of API, how to call them, and how it works.
At the end of this article, you will know:
- The few things you can do with Auth0
- The steps in integrating Auth0 in your React application
Few things you can do with Auth0
- You can add authentication and authorization for your users with a username and password, enterprise account, social media accounts, etc.
- You can implement single sign-on(SSO) in your application.
- Users can login with a one-time code using email or SMS
- You can build an API and secure it with 0Auth.2.0
- You can use analytics to track activities on your site or application
- You can enforce multi-factor authentication (MFA) when your users want to access sensitive data, etc
Please note: There are so many other things you can do with Auth0. You can check out the documentation here for more.
Steps in integrating Auth0 in your React application
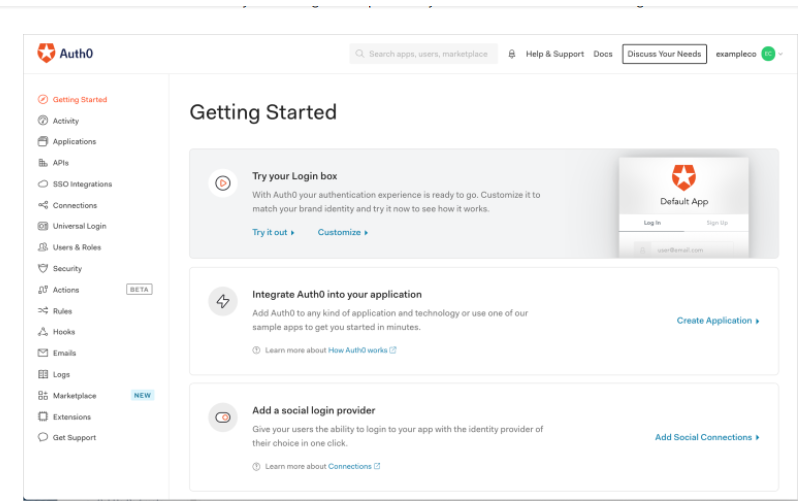
Create an Auth0 account and once you do this, a tenant is automatically created for you. This is where you configure and regulate your use of auth0.
Once signed in, open your Auth0 dashboard, go to getting started then on the Integrate Auth0 into your application card, click create an application.
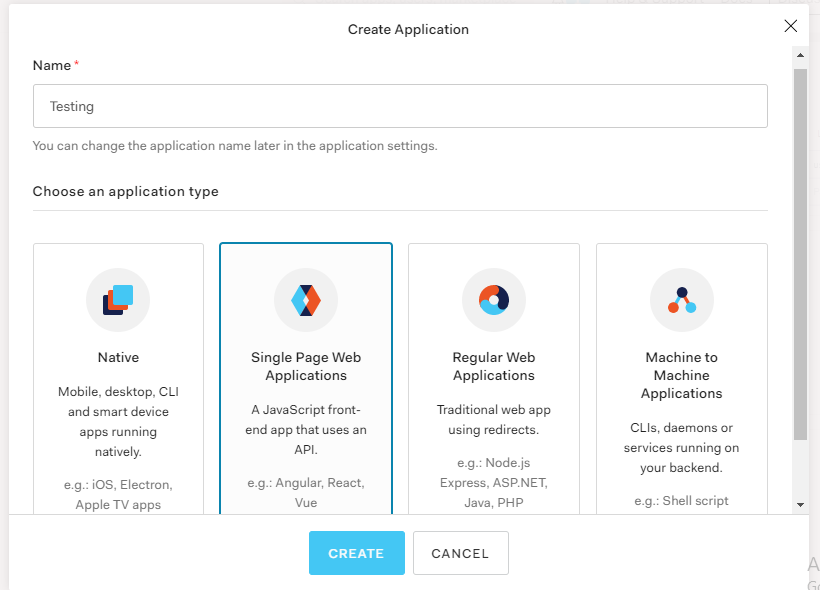
- On the create application page, give your application a name and select “Single Page Web Applications” as your application type and click create.
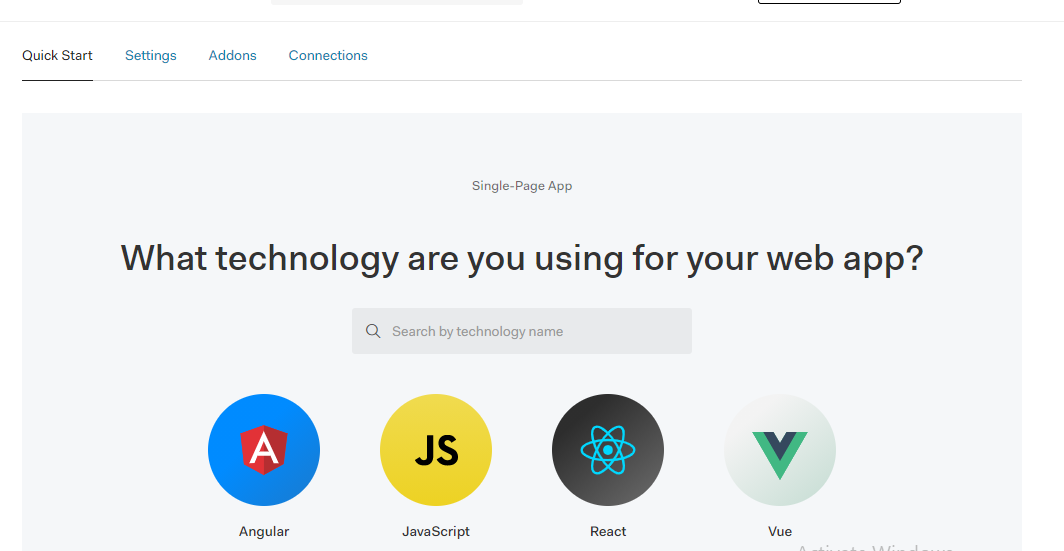
- Then under your application page, you will be asked to choose a technology you will be using for your app. Select React.
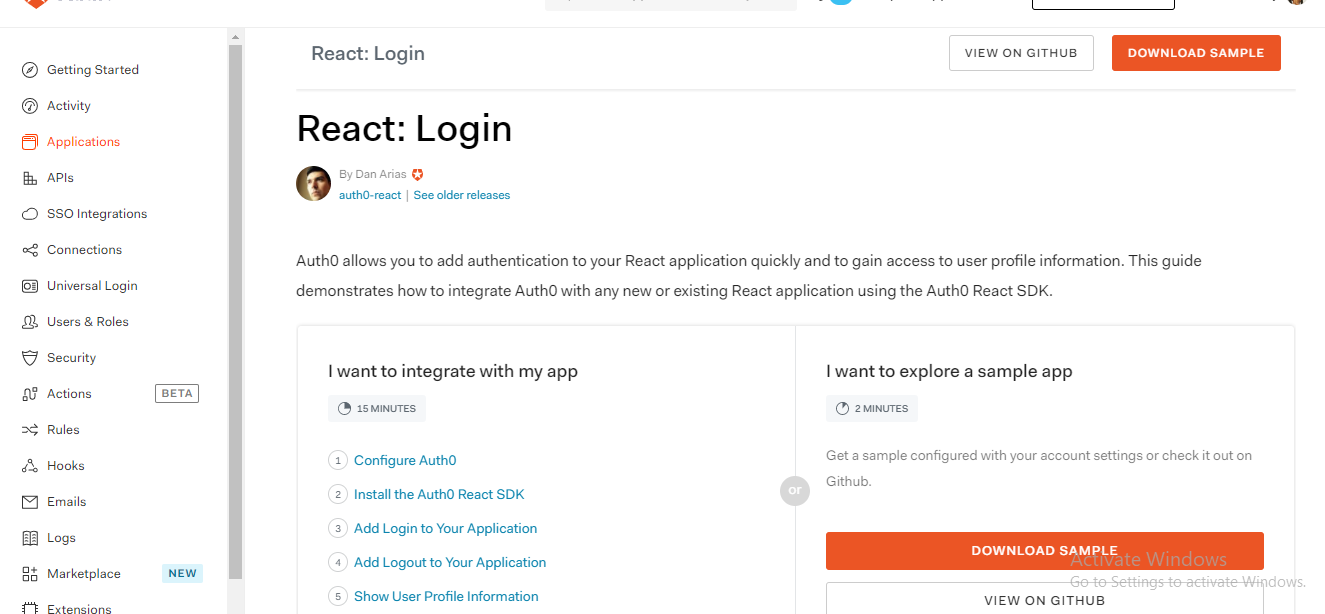
- Then the React: Login page appears. You can either try out a sample Login page or you integrate it by yourself in your app.
To Integrate Auth0 into your application yourself:
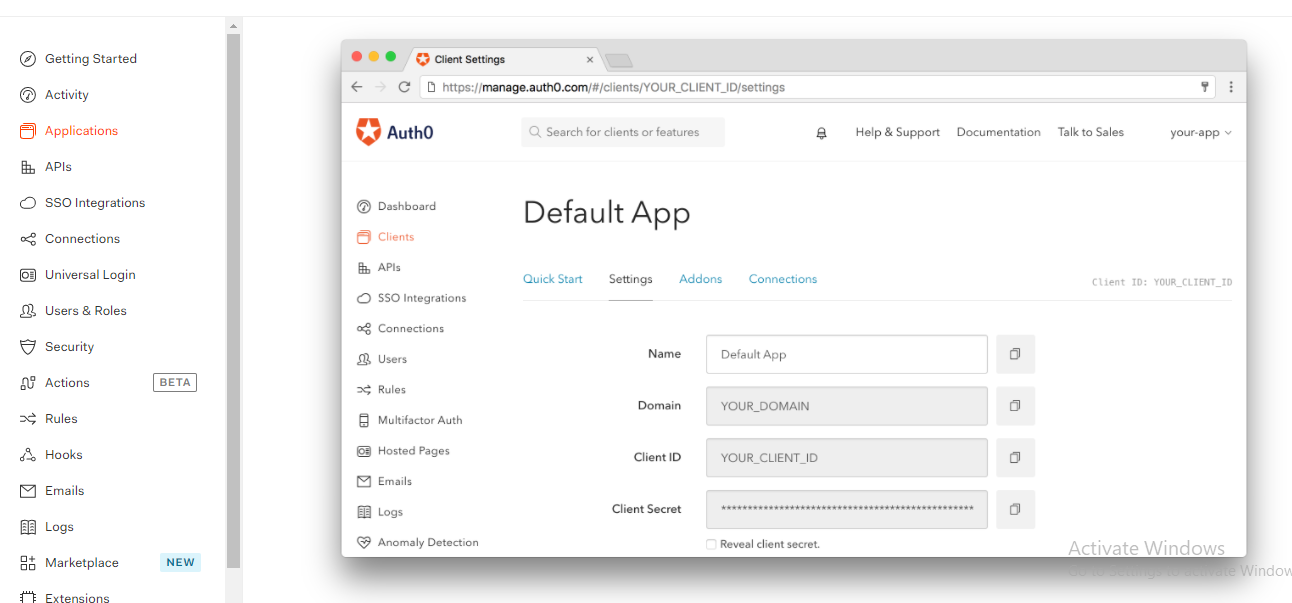
- On your application page, go to settings and copy your domain and client ID of the application you created (You will need it to add to your application)
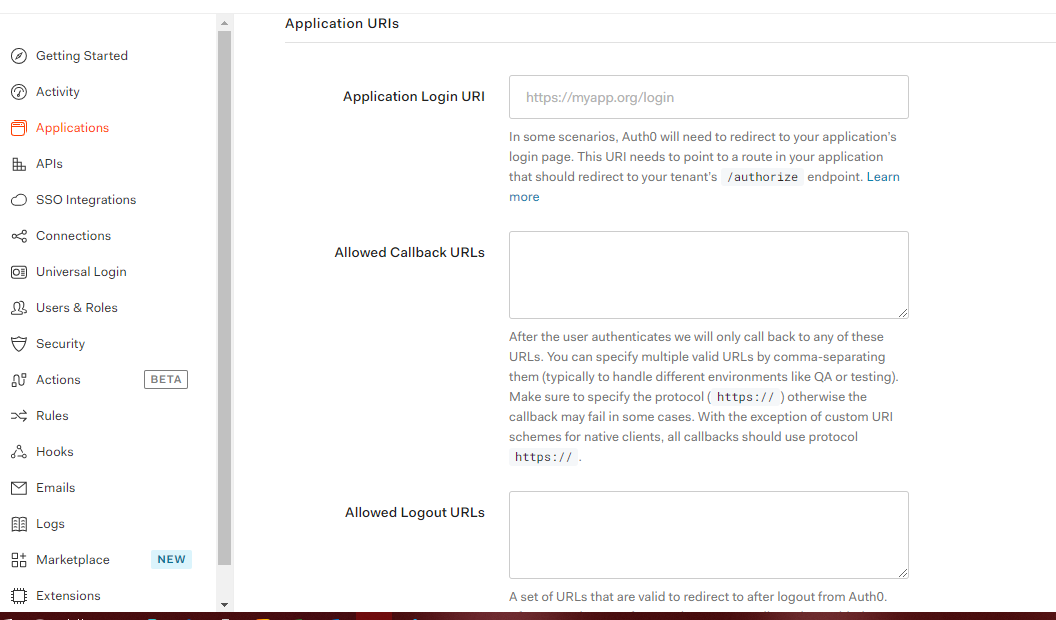
- In your settings, under Applications URLs you will be asked to input things like your call back URL, Logout URL, allowed web origins, etc
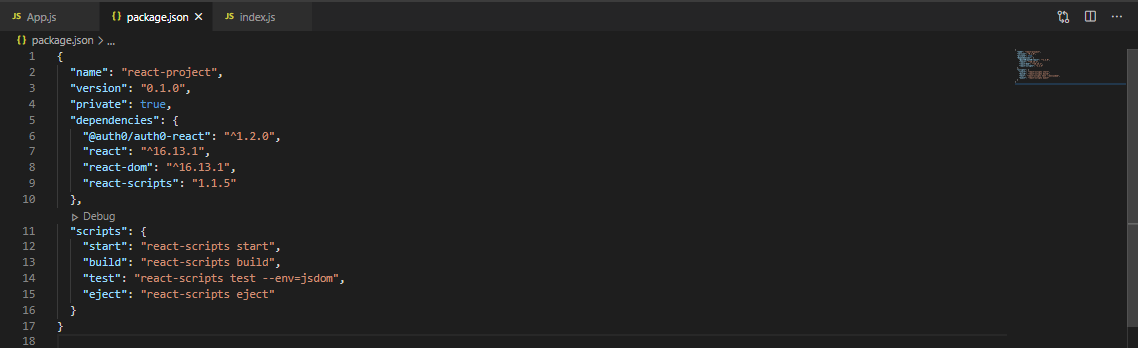
Then to integrate Auth0 into your React application, you will have to run
npm install @auth0/auth0-react
Once you install it, under your package.json you will see the auth0-react package has been added.
- For you to integrate your Auth0 on your React app, you will need to wrap your root component (Index.js) with your Auth0provider that you can import from SDK installed earlier.
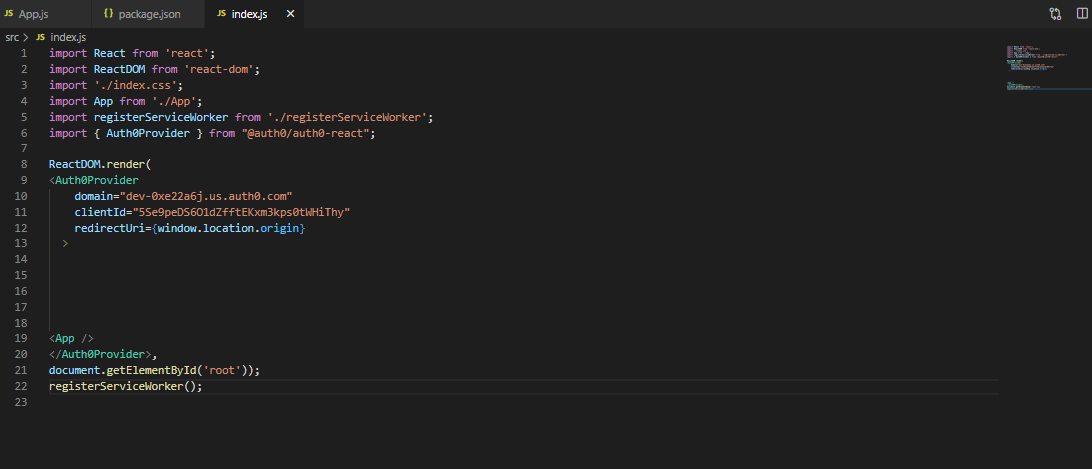
Then remember to set Allowed Web Origins and _Allowed Logout URLs in the application settings_ to
localhost:3000
The Callback URL is a trusted URL for your application. Auth0 redirects the client to this URL once authentication is completed. set it to localhost:3000/callbackNote: In your Auth0 provider, this is where you input your domain, client id and redirect url.
Then create a Login component, this component will display a button that will start the authentication process when clicked
import React from "react";

import { useAuth0 } from "@auth0/auth0-react";

const LoginButton = () => {
const { loginWithRedirect } = useAuth0();

return <button onClick={() => loginWithRedirect()}>Log In</button>;
};
export default LoginButton;
Then create a Logout component, this component will display a button that will start the logout process when clicked
import React from "react"; import { useAuth0 } from "@auth0/auth0-react"; const LogoutButton = () => { const { logout } = useAuth0(); return ( <button onClick={() => logout({ returnTo: window.location.origin })}> Log Out </button> ); }; export default LogoutButton;- To set up your Auth0 service, add your audience and scope props to your Auth0 provider in your index.js
When a user authenticates, you request an Access Token and include the target audience and scope of access in your request.
audience="YOUR_DOMAIN/api/v2" scope="read:current_user update:current_user_metadata"
- You need to create a profile component that will help you retrieve your information when you Login. This is a code that can be used to set up your component.
import React, { useEffect, useState } from "react";
import { useAuth0 } from "@auth0/auth0-react";

const Profile = () => {
  const { user, isAuthenticated, getAccessTokenSilently } = useAuth0();
  const [userMetadata, setUserMetadata] = useState(null);

  return (
    isAuthenticated && (
      <div>
        <img src={user.picture} alt={user.name} />
        <h2>{user.name}</h2>
        <p>{user.email}</p>
        <h3>User Metadata</h3>
        {userMetadata ? (
          <pre>{JSON.stringify(userMetadata, null, 2)}</pre>
        ) : (
          "No user metadata defined"
        )}
      </div>
    )
  );
};
export default Profile;
11 Then set up your access token and add the following code to your profile component
import React, { useEffect, useState } from "react";
import { useAuth0 } from "@auth0/auth0-react";

const Profile = () => {
  const { user, isAuthenticated, getAccessTokenSilently } = useAuth0();
  const [userMetadata, setUserMetadata] = useState(null);

  return (
    isAuthenticated && (
      <div>
        <img src={user.picture} alt={user.name} />
        <h2>{user.name}</h2>
        <p>{user.email}</p>
        <h3>User Metadata</h3>
        {userMetadata ? (
          <pre>{JSON.stringify(userMetadata, null, 2)}</pre>
        ) : (
          "No user metadata defined"
        )}
      </div>
    )
  );
};

export default Profile;
12 As it is, userMetadata is always null in the Profile component. Add the following useEffect() hook to the component to fetch the user metadata from an API:
useEffect(() => {
  const getUserMetadata = async () => {
    const domain = "YOUR_DOMAIN";

    try {
      const accessToken = await getAccessTokenSilently({
        audience: `https://${domain}/api/v2/`,
        scope: "read:current_user",
      });

      const userDetailsByIdUrl = `https://${domain}/api/v2/users/${user.sub}`;

      const metadataResponse = await fetch(userDetailsByIdUrl, {
        headers: {
          Authorization: `Bearer ${accessToken}`,
        },
      });

      const { user_metadata } = await metadataResponse.json();

      setUserMetadata(user_metadata);
    } catch (e) {
      console.log(e.message);
    }
  };

  getUserMetadata();
}, []);
For the sample app
Under your Quickstart in your application React:Login page, select "I want to explore a sample app" 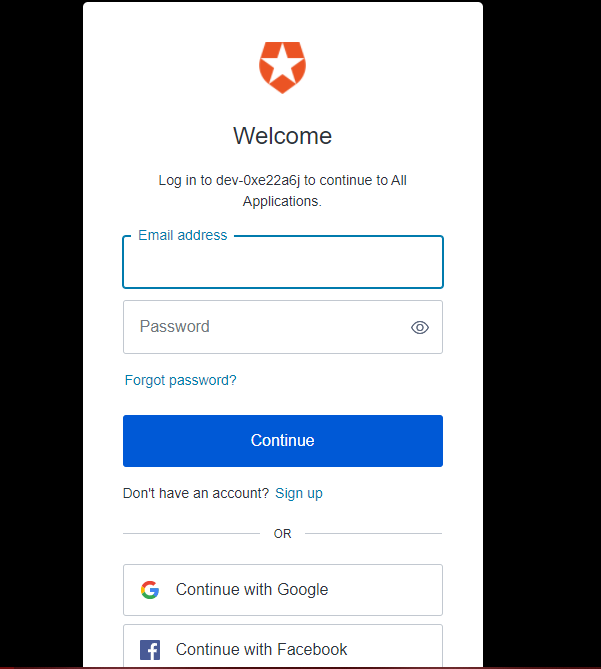
You can choose to customize or use a _**universal Login found on your _dashboard**_
Conclusion
This article basically explains how Auth0 can be added to your react application. There are a lot more you can do with Auth0 to secure your application